
How to Invite and Manage User Access to Your REPSLog Account
You may want to give another person (such as your spouse, property manager, or assistant) access to your REPSLog account so they can log activities or export logs on your behalf.
Manage User Access lets you securely share your REPSLog account with others — without sharing your password.
This feature is available to Premium plans only, but Invited users can use a free REPSLog account to access.
For Account Owners
How to Invite a User
Open REPSLog
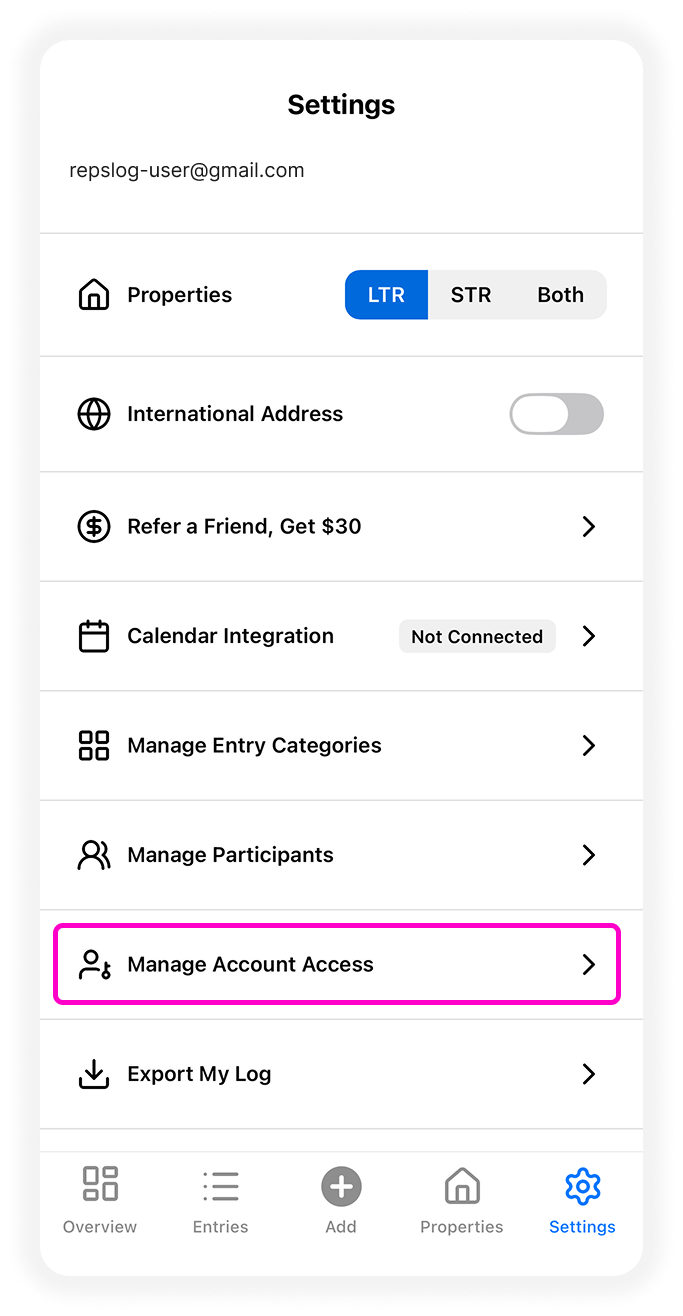
Go to Settings
Tap Manage Account Access
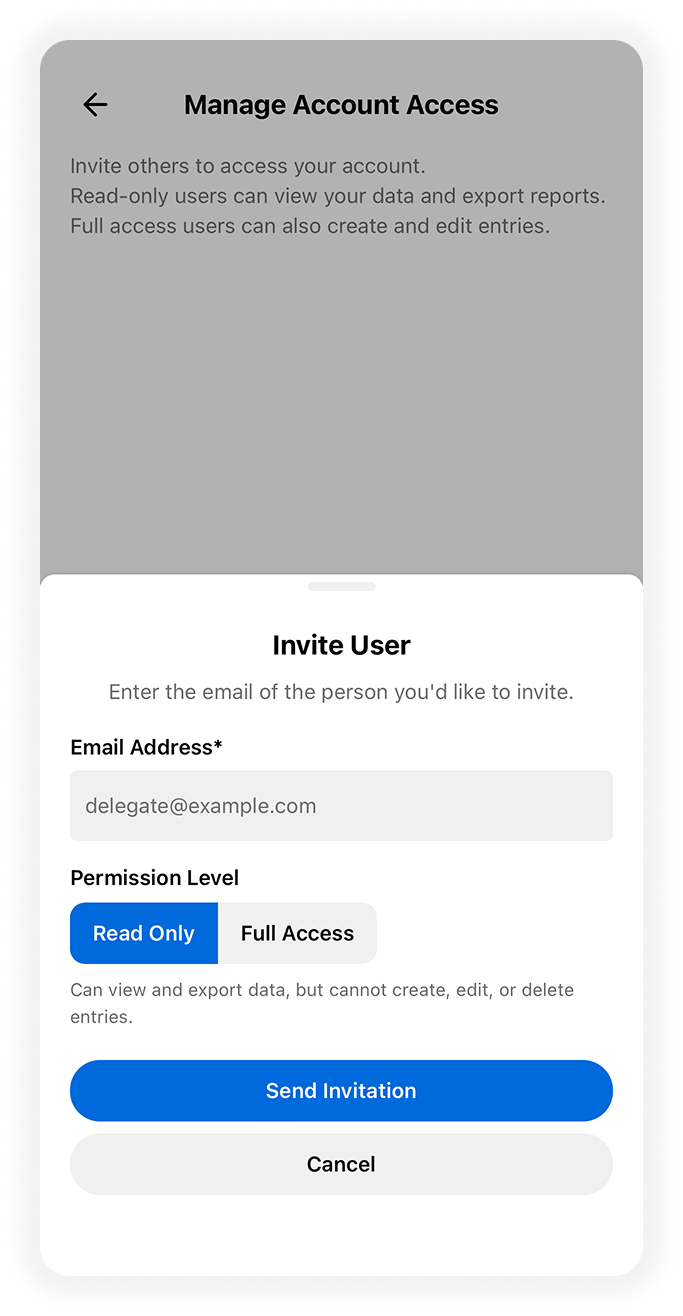
Tap Invite Users
Enter the user’s email address
-
Select a permission level: Read Only or Full Access
Read only can view and export data, but cannot create, edit or delete entries, properties, and categories.
Full Access can view, export and also create entries, manage properties and categories.
Please note, full access users CANNOT manage your account subscription, delete your account, or share access with other users.
Tap Send Invitation
The invited user will receive an email notification and will need to accept the invitation.
Managing Active Users
After someone accepts your invitation, they appear under Active User Access.
From this screen you can:
Change Permission
Tap the permission badge next to their name
Confirm the change
-
If upgraded to Full Access, they’ll receive an email notification
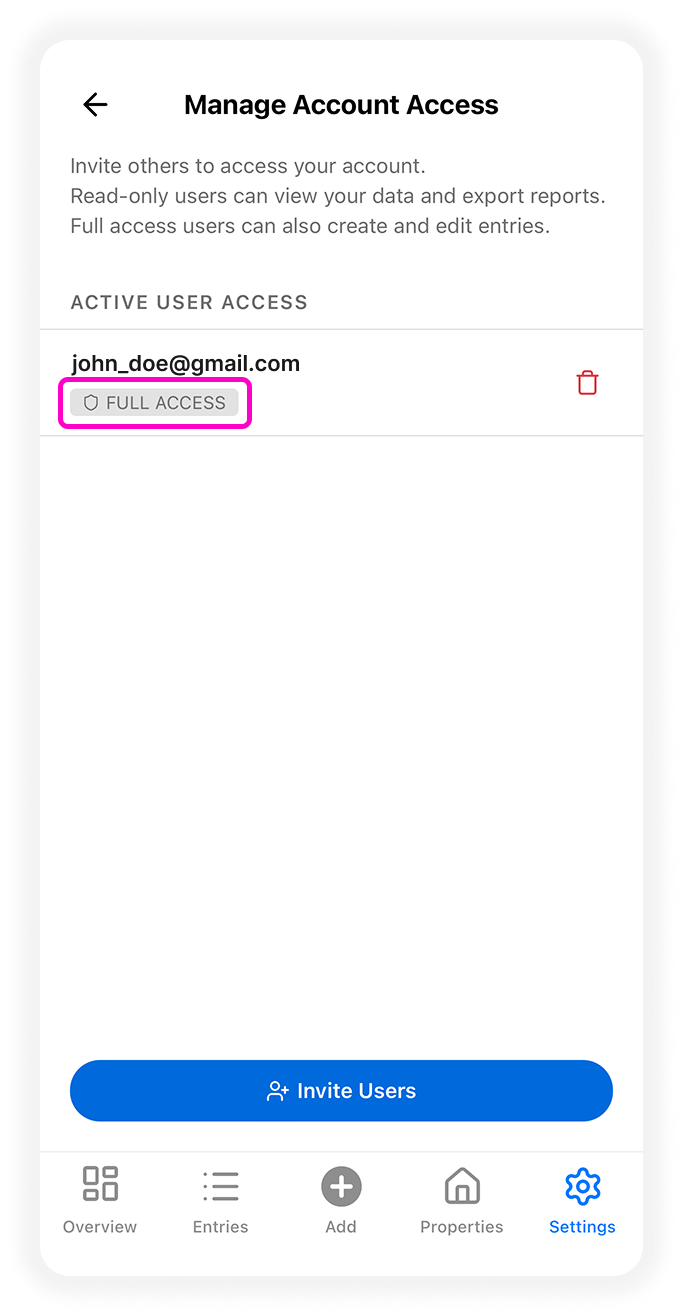
Revoke Access
Tap the trash icon
-
Confirm removal
Access is removed immediately.
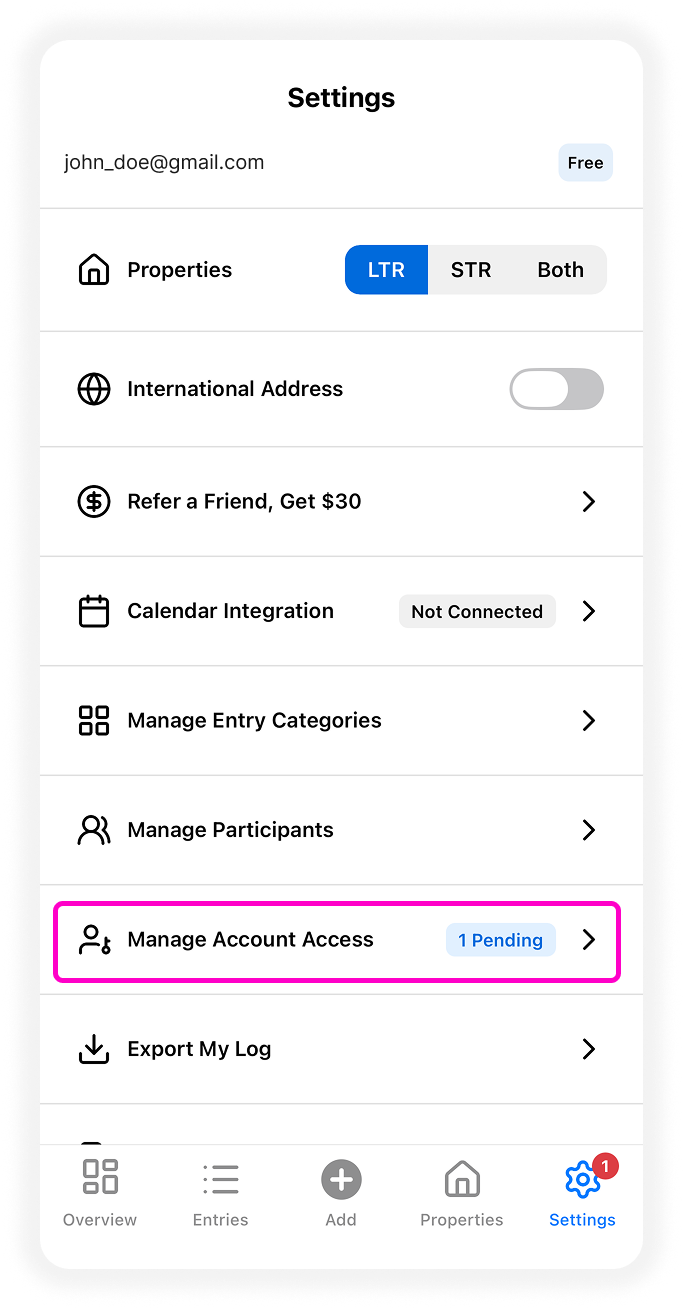
Managing Invitations
Cancel a Pending Invitation
Go to Pending Invitations
Tap the trash icon next to the invite
Resend a Declined Invitation
Go to Declined Invitations
Tap the send icon to resend
For Invited Users
Accepting an Invitation
There are two ways to accept:
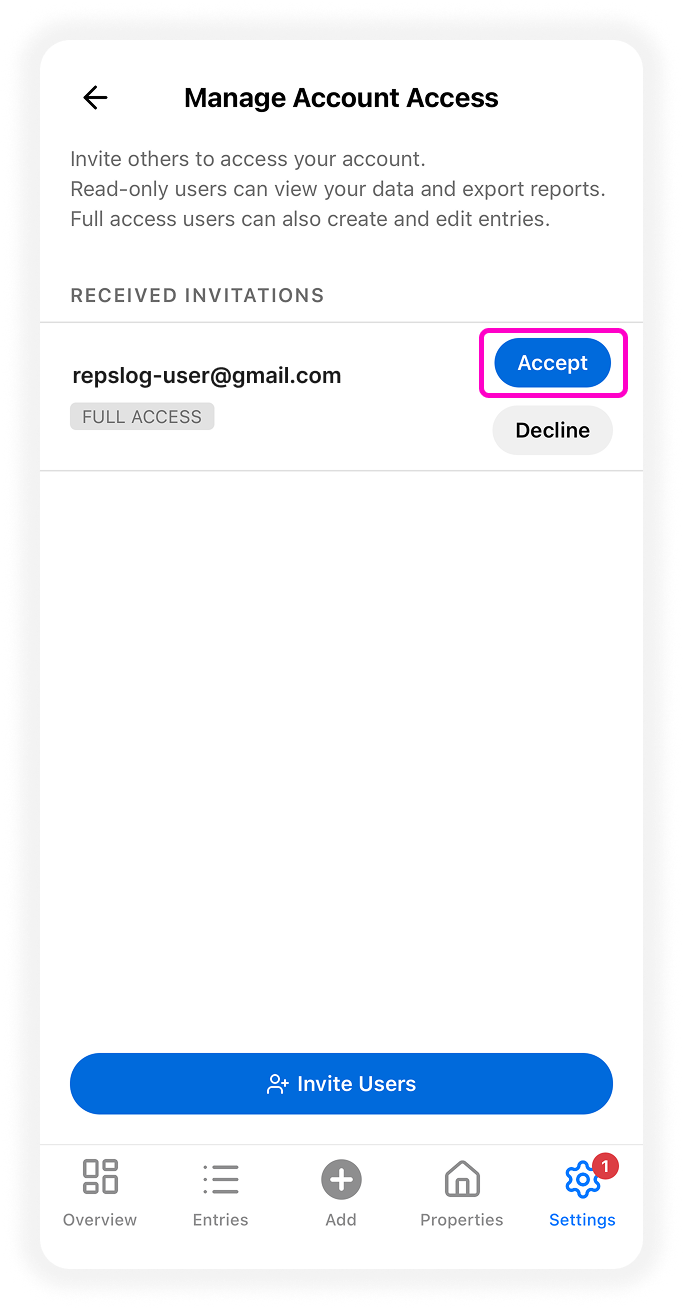
1. From Manage Account Access
Go to Settings
Tap Manage Account Access
Under Received Invitations, tap Accept
2. From the Desktop Dashboard
When you sign in on desktop, a banner appears at the top of the screen.
Tap Accept or Decline.
After accepting, you’ll be asked whether you want to switch to the shared account immediately.
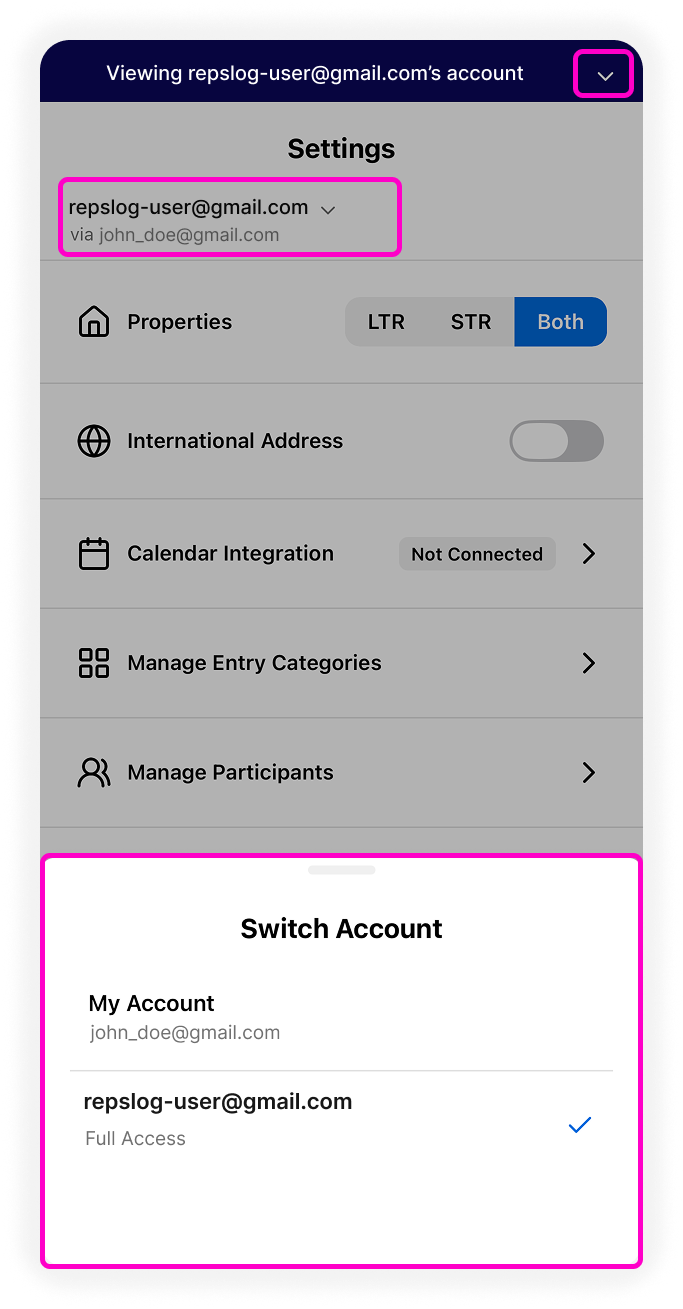
Switching Between Accounts
Once you have access to multiple accounts:
Go to Settings
Tap your account name at the top
Select the account email address you wish to view
A banner at the top confirms which account you’re viewing.
If you're using desktop, click on the account name on the bottom left of your screen, and select the account you wish to view or edit.
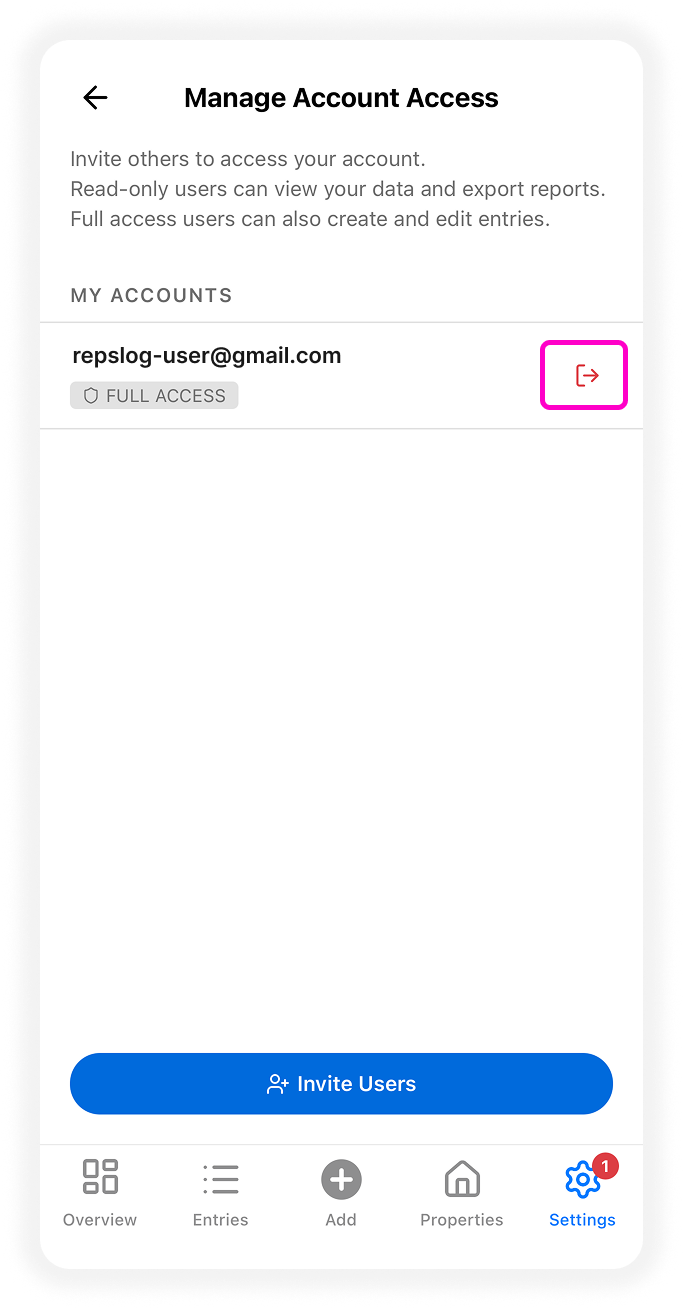
Leaving a Shared Account
If you no longer need access:
Go to Settings → Manage Account Access
Under My Accounts, tap the leave icon
Confirm
You’ll be switched back to your own account.
To regain access, the owner must send a new invitation.
FAQs
Does the invited user need a REPSLog account?
Yes. They must have a REPSLog account with a verified email matching the invitation.
Can I be both an owner and have access to other accounts?
Yes. You can manage users for your account and also accept invitations from others.
What happens if access is revoked?
You’ll immediately be switched back to your own account and notified.
What happens if an invitation is declined?
It will appear in Declined Invitations and can be resent.
How many users can I invite to access my account?
You can have up to 5 users total (active and pending combined).
Sharing Access with Email & Password Login
If you don't wish to upgrade to premium, you may give access by sharing your email and password with the person you want to give access to.
If you originally signed up with an email and password:
Share your email and password with the person you want to give access to.
They can download REPSLog on their own device.
At the login screen, enter your account’s email and password.
Once logged in, they’ll see the same account data and can add or view entries.
⚠️ Important: Anyone with your credentials has full access to your account. Make sure you trust the person you share them with.
If You Signed Up with Google or Apple ID
If you originally created your REPSLog account using Sign in with Google or Sign in with Apple, you won’t have a password set by default. To share access, you’ll need to create one:
On the REPSLog login screen, tap Forgot Password?.
Enter the same email you use for your Google or Apple ID.
Check your email inbox for a password reset link and follow the steps to set a new password.
Share your email and new password with the other user.
They can now log in with those credentials on their own device.
Best Practices
Only share your login details with people you fully trust.
If you no longer want to share access, you can reset your password at any time to revoke access on other devices.
Both you and the other user can be logged in at the same time from different devices.